Tuesday, 20 November 2018

Yoga for Healthy Aging Intensives for 2019

by Baxter

We are pleased to announce our upcoming Yoga for Healthy Aging Intensives for 2019! The Namaste Yoga Studio has once again invited us to lead the intensive at their wonderful studio on Berkeley, CA, in June, and we have been invited back to Kripalu Center in Massachusetts for a residential retreat experience in September. The dates and links are below. You can officially register for the June event at Namaste Berkeley now. Kripalu should have registration for the retreat available on their website early in 2019, so if our east coast location works for you, please save the dates.

June 24th-29th, 2019
Namaste Yoga Studio
Berkeley, California
More info here!

September 22nd-29th, 2019
Kripalu Center for Yoga and Health
Stonebridge, Massachusetts
Save the Dates! Registration opens in early 2019

To check for updates or changes for future trainings, see this dedicated page on my website: baxterbell.com/yoga-for-healthy-aging-intensives/.

Here more details about the trainings:

This 30-hour course will provide instructions on maintaining your physical, mental, and emotional health as you age. The main focus of the course is on preventative strategies, covering:

  • Strength 
  • Flexibility 
  • Agility 
  • Balance 
  • Stress Management 
  • Circulatory System and Heart Health 
  • Brain Health 
  • Equanimity 
Baxter and Melina present the scientific background that explains how and why yoga works to foster healthy aging, so you’ll understand which techniques to use when. We’ll also teach you the essential yoga poses, yoga sequences, and other practices that will set you up for a lifetime of practice.

This intensive is designed for relatively healthy, relatively physically able participants of all ages. Not included in workshop: 1) Instructions for seniors who cannot stand unaided and need to practice in chairs, and 2) Information about yoga as therapy for specific medical conditions.

For certified yoga teachers interested in taking the Intensive, this course will provide supplemental, specialized training in yoga for healthy aging techniques, which you can then teach to your own students. For yoga students with one or more years of experience, this course will provide you with the tools to create a personalized yoga program that meets your particular needs and concerns.

For teachers who want YHFA Certification, you will need to:

1. Attend all the sessions during the intensive.

2. Attend the extra session at the end of the intensive, where you’ll do a short teaching demonstration.

3. Pass the take-home, open-book final that Baxter and Melina provide using the book Yoga for Healthy Aging: A Guide to Lifelong Well-Being.

4. Provide a copy of your basic yoga teacher certificate (minimum 200-hour training required) or resume reflecting equivalent experience.

ABOUT THE TEACHERS


Baxter Bell, MD, C-IAYT, eRYT500 is co-author with Nina Zolotow of Yoga for Healthy Aging: A Guide to Lifelong Well-Being and a co-founder of and regular contributor to the Yoga for Healthy Aging blog, where he shares his knowledge of medical conditions, anatomy, and yoga with practitioners and teachers across the world. In addition to teaching classes, workshops, teacher trainings, and retreats internationally, Baxter has been a presenter at Yoga Journal Conferences and the International Association of Yoga Therapy’s Sytar Conference, and teaches online courses at YogaUOnline.

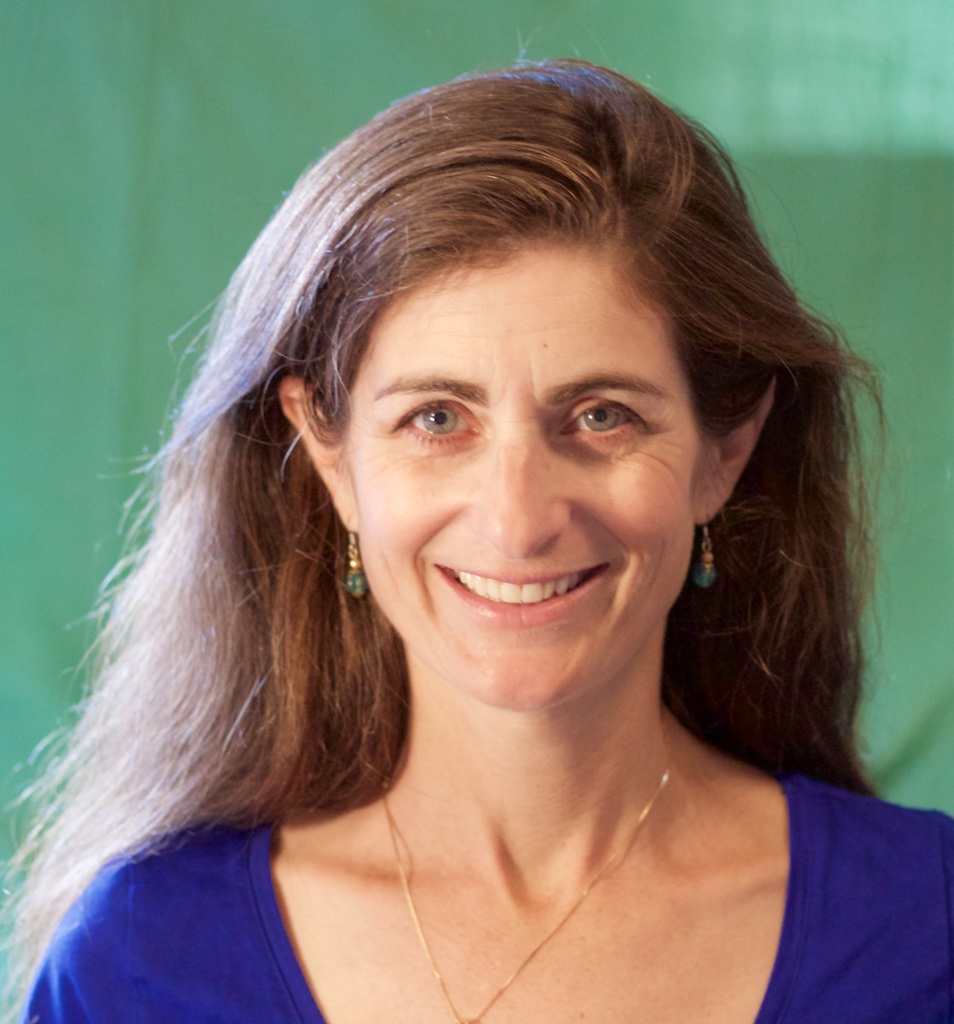
Melina Meza, eRYT500, BS Nutrition is a certified YFHA teacher and Ayurvedic health educator, who has been sharing her knowledge of yoga for over 20 years. Since 1997, Melina has been teaching at 8 Limbs Yoga Center in Seattle, where she is co-director of their teacher-training program. Meza is the author of the Art of Sequencing books and contributing photographer for Yoga for Healthy Aging blog. Currently residing in Oakland California, Melina facilitates year-round yoga workshops and retreats.


Subscribe to Yoga for Healthy Aging by Email ° Follow Yoga for Healthy Aging on Facebook and Twitter ° To order Yoga for Healthy Aging: A Guide to Lifelong Well-Being, go to AmazonShambhalaIndie Bound or your local bookstore.

Follow Baxter Bell, MD on YouTubeFacebook, and Instagram. For upcoming workshops and retreats see Baxter's Workshops and for info on Baxter see baxterbell.com.  

Monday, 19 November 2018

Video of the Week: Hands-Free Thread the Needle Pose

This hands-free version of Thread the Needle pose adds strengthening of your core muscles to the stretch of the deep buttocks muscles that you get from the classic pose. Those with vulnerable lower backs should watch the video through before deciding if it is right to try this version or do my early versions instead (see here).


Subscribe to Yoga for Healthy Aging by Email ° Follow Yoga for Healthy Aging on Facebook and Twitter ° To order Yoga for Healthy Aging: A Guide to Lifelong Well-Being, go to AmazonShambhalaIndie Bound or your local bookstore.

Follow Baxter Bell, MD on YouTubeFacebook, and Instagram. For upcoming workshops and retreats see Baxter's Workshops and for info on Baxter see baxterbell.com.  

Friday, 16 November 2018

The Biochemical Basis for a Gratitude Practice (Rerun)

by Nina
In a Meadow by Melina Meza
 II.33 Upon being harassed by negative thoughts, one should cultivate counteracting thoughts. —translated by Edwin Bryant

For some time now, I’ve been intrigued by Facebook posts from certain friends that simply list things the person is grateful for. I particularly like the ones by my friend Liz because her lists include very simple things, mostly free and available to almost everyone.

Today's good things:

  1. Walked six miles;
  2. Dog therapy on campus today, in particular the golden retriever puppy;
  3. Watching the bushtits (birds) flit in and out of the trees on campus;
  4. Got a lot of items off my 'to do' list at work, moving forward with several work projects and learning new things.
I also happen to know this gratitude practice is a very serious one for Liz, because she suffers from a serious, chronic illness that affects her quality of life and requires quite a bit of time spent in the hospital. She says, “It’s been bumpy, but I saw research that said gratitude practice helps. And I set intentions at the beginning of each day and have seen improvement.”

Today's good things:
  1. Three mile walk at lunch, great watching the hawks circle;
  2. Very productive day at work, a lot of weeding and organizing;
  3. Ran into a lovely friend whom I haven't seen in a while, always great to catch up;
  4. Gluten-free ice cream sandwiches
So I was very intrigued when I learned that neuroscientist Alex Korb’s book The Upward Spiral: Using Neuroscience to Reverse the Course of Depression, One Small Change at a Time actually provides a scientific explanation of why this practice works. Feelings of gratitude activate the part of the brain that produces dopamine, a messenger molecule that stimulates your brain's reward and pleasure center, and stimulates your social dopamine circuits, which make your social interactions more pleasurable. It can also increase your serotonin levels, increasing your happiness.

“The benefits of gratitude start with the dopamine system, because feeling grateful activates the brain stem region that produces dopamine. Additionally, gratitude toward others increases activity in social dopamine circuits, which makes social interactions more enjoyable …”

“One powerful effect of gratitude is that it can boost serotonin. Trying to think of things you are grateful for forces you to focus on the positive aspects of your life. This simple act increases serotonin production in the anterior cingulate cortex.” —Dr. Korb


When I was thinking about how this practice related to yoga (haha, I figured it must!), I came back to this sutra by Patanjali about cultivating the opposite (pratipaksa-bhavanam).

II.33 Upon being harassed by negative thoughts, one should cultivate counteracting thoughts. —translated by Edwin Bryant

Bryant explains in his commentary on this sutra that the “negative thoughts” being referred to are those that counter the yamas and niyamas. So thoughts that are the opposite of contentment (the niyama santosha), such as dissatisfaction, displeasure, and unhappiness, would count as negative thoughts that you should counteract. And the practice of being grateful for what you have, which is cultivating contentment, is indeed the practice of cultivating thoughts that counteract dissatisfaction, displeasure, and unhappiness.

Of course, when you are being “harassed by negative thoughts,” it often isn’t easy to find and focus on things you are grateful for. But Korb says, the effort alone provides the benefits.

“It’s not finding gratitude that matters most; it’s remembering to look in the first place. Remembering to be grateful is a form of emotional intelligence. One study found that it actually affected neuron density in both the ventromedial and lateral prefrontal cortex. These density changes suggest that as emotional intelligence increases, the neurons in these areas become more efficient. With higher emotional intelligence, it simply takes less effort to be grateful.”

Fascinating, isn’t it? Just like strengthening a muscle, a regular gratitude practice makes you stronger at being grateful over time. So that means getting better as it as you age, and eventually more time spent in a state of contentment. And those brain density changes? That sounds to me like the gratitude practice is improving brain strength—always a good thing.

And by the way, thank you Liz for agreeing to share your story with us. I'm grateful for your friendship and your honesty.

Subscribe to Yoga for Healthy Aging by Email ° Follow Yoga for Healthy Aging on Facebook ° Join this site with Google Friend Connect

Thursday, 15 November 2018

Friendly Reminder: We All Age, Too

by Nina

“Just as this is not the best of all possible worlds, your body is not the best of all possible bodies. But it’s the only one you’ll ever have, and it’s worth enjoying, nurturing, and protecting. “ —Daniel E. Lieberman from The Story of the Human Body: Evolution, Health, and Disease 


You know how we have to be reminded—even through it is obvious—that we’re all going to die? 

Well, I think it’s also worth reminding everyone that if we make it to adulthood, we’re all going to age. No matter what race you are, you will age. No matter whether you are thin or have a larger body, you will age. No matter what your sexual orientation or gender identity is, you will age. No matter whether you are fully able-bodied or have a disability of some kind, you will age. No matter whether you are basically in good health or have a chronic disease, you will age. Whatever kind of body you have, right here and right now, that body will age. 

So that’s why practicing yoga for healthy aging is essential self-care for everyone. Most of us, no matter what kind of body we start with, can work on strength, flexibility, balance, agility, and cardiovascular health for whatever body parts we have that can move, even in a limited fashion. For example, here is a video from the Accessible Yoga YouTube channel of a chair sequence for improving balance: 


And all of us who have an active brain can work on stress management, brain health, and equanimity. 

For example, suppose you have a serious chronic illness, as my friend Liz does (see The Biochemical Basis for a Gratitude Practice). She practices yoga and meditation for her peace of mind, which improves the quality of her life. But she also “nurtures” and “protects” her body by using the asana practice, as well as walking, for its physical benefits to help maintain the body she has. I’m always inspired to see how well she cares for herself! 

I thought about this after reading Jivana’s post Yoga and Human Rights, when he quoted Audre Lorde:

“Caring for myself is not self-indulgence, it is self-preservation, and that is an act of political warfare.” 


From my point of view "caring" for yourself includes nurturing your body—the only one you'll ever have—as well as your soul.


Subscribe to Yoga for Healthy Aging by Email ° Follow Yoga for Healthy Aging on Facebook and Twitter ° To order Yoga for Healthy Aging: A Guide to Lifelong Well-Being, go to AmazonShambhalaIndie Bound or your local bookstore.


For information about Nina's upcoming book signings and other activities, see Nina's Workshops, Book Signings, and Books.

Wednesday, 14 November 2018

A Different Way to Twist: Hands-Free Twisting

by Baxter 
A while back, I started playing around with what I call “hands-free” twisting in seated and standing poses. I can’t recall exactly why I started playing around with this idea, but it may have been inspired by a dynamic standing sequence my wife Melina Meza teaches that includes a hands-free twist. In any case, I became curious about how this way of twisting might be of benefit.

Typically you use your hands to push and pull you in a twist, for example, as you would in Easy Sitting Twist with one hand on your knee and the other on the floor. However, when you twist your torso without using your hand to push or pull on anything, for example in Easy Sitting Twist with your arms raised to shoulder level, you are experiencing your “active” range of motion of your spine. This is the actual amount of movement that your spinal rotating muscles can create on their own, including both the deep rotator muscles, such as the rotatores muscles (that’s right—they rotate you!), and more superficial muscles, such as your middle abdominals (the obliques), as well as many others. I feel this is beneficial for two reasons. First, by only using your rotating muscles, you are targeting them specifically for strength building. And because those muscles attach directly to your spinal bones, they can also help to keep the spinal bones stronger. Second, you may be avoiding over-rotating your spinal bones. Over-rotating, which you are at risk of doing when you involve the hands and arms more actively in creating your twists, take you into “passive” range of motion, which could lead to soft tissue or bone injury. 

To feel the difference between your active and passive range of motion, you can try a little experiment (as long as you do not have osteoporosis or osteopenia, in which case, it is best to watch someone else try this): 

1. Sit in Easy Sitting pose and find your inner lift (see Friday Q&A: Can You Straighten Your Spine).

2. Bring your arms into Bird Wings (take them out to your sides at shoulder level, with your elbows bent to 90 degrees and your hands pointing to the ceiling).

3. Slowly rotate your upper belly, chest, and head to the right until you cannot go any further, noting where you are. This is your active range of motion.

4. Now, bring your hands to knees and floor. Then carefully and gradually push with your back hand and pull with your front hand to see how much further you are able to turn. This extra distance is your passive range of motion.

5. Release to center and repeat on the second side.

Passive range of motion involves adding an outside force in addition to using the muscles needed to create an action at a joint (in this case, rotation between spinal bones), and in the seated and standing twists, that outside force is usually your hands and arms. (In other types of poses, there can be other outside forces. For example, in Child’s pose, it is the weight of your body pressing down on your legs that takes you into deeper bend of your hips and knees and in Reclined Leg Stretch pose, it is using the strap to pull on your leg that takes your hip joint into a deeper bend.)

If you are generally healthy, and as long as it feels okay and you do it mindfully, you can certainly add in the passive range of motion to your twists, which, of course, take you further in your range of motion. 

You can certainly practice your twists the classic way, which includes moving into your passive range of motion. However, I have noticed some of my students very aggressively using their arms to go further into twists, which I regularly caution against due to the risk of injury from practicing this way. And for those with osteoporosis and osteopenia who have been warned about twists in general, skipping the passive range of motion may allow safer exploration of turning of the spine while lowering the chance of breaking a spinal bone. However, I’d recommend you do this under the guidance of an experienced yoga teacher or yoga therapist (The most commonly fractured bones in osteoporosis and osteopenia are the spinal bones, or vertebrae, in the rib cage area). 

The biggest drawback to hands-free twisting is more about personal preference than anything else; you don’t rotate as far as you would if you used the arms to push and pull you deeper into the twist, which for some people is not as satisfying, especially if the belief is that a deeper twist is a better twist (obviously, from what I have said already, I am not one of those people). In addition, you might best explore this in your home practice, as your teacher may have different ideas about twisting in a class setting. 

I hope that the reasons presented will at least inspire you to experiment with the hands-free style and see what effects you notice. You can also play with your arm position. For example, sometimes I take my arms into Bird Wings or Airplane position (arms straight out to sides) if I want some additional strengthening for the arms and shoulders and other times I just lift my hands a bit above where they’d normally to make the pose easier. To date, I have applied this technique for dynamic and static versions of Easy Sitting pose, Sage’s Twist 3, Half Lord of the Fishes pose, and Upright Revolved Triangle Pose (no forward bend done in this version). See the links below to view and try some of them!

Easy Sitting Twist, Hands Free
Sage’s Twist 3, Hand Free
Half Lord of the Fishes, Hand Free 

I’ll be adding videos soon of the modified Revolved Triangle pose and Melina’s standing sequence! 


Subscribe to Yoga for Healthy Aging by Email ° Follow Yoga for Healthy Aging on Facebook and Twitter ° To order Yoga for Healthy Aging: A Guide to Lifelong Well-Being, go to AmazonShambhalaIndie Bound or your local bookstore.

Follow Baxter Bell, MD on YouTubeFacebook, and Instagram. For upcoming workshops and retreats see Baxter's Workshops and for info on Baxter see baxterbell.com.  

Tuesday, 13 November 2018

Tricky Trikonasana: My Travels with Triangle Pose

by Sandra Razieli
When I first started practicing yoga, Triangle (Trikonasana )was an iconic pose. Those who could get their hand all the way to the floor were considered to be advanced practitioners. Having a bit of hypermobility, I was able to accomplish this fairly quickly and thought I was doing good for my body.

Then I began to learn more about alignment and realized that lengthening the spine is a fundamental aspect and benefit of modern postural yoga. Yoga instructor Matthew Sanford puts it succinctly, "It's all about the spine – stupid." With this insight, I adjusted my practice to make the length of my spine a central focus of my practice. On days where I felt tighter, I reluctantly used a block.

Yet, sometimes in class as I looked around the room and saw bendy people placing their palms all the way on the floor, I still felt the pressure of achievement. Occasionally, I caved into this inner pressure and also reached toward the floor even though it compromised my spinal position. Fortunately, this ended on the day that I heard Ramanand Patel, a senior teacher in the Iyengar lineage firmly proclaim, "I've been to the floor, I've been below the floor and believe me, enlightenment is not there! From that day forward, I consistently practiced Triangle pose with a block. 

While I was studying and teaching yoga, I was also regularly playing soccer. I have a distinct memory of experiencing a disconcerting sensation on a cool evening at Martin Luther King Park in Berkeley. We were enjoying a playful scrimmage after a long series of intensive drills during our regular Tuesday evening practice. I kicked the ball to make a simple pass, something I had done thousands of times before, but this time was different. I felt a momentary gripping pain in my inner thigh. With my knowledge at the time, I thought I had tightened something and just needed to stretch. This moment began a 10-year journey for me as the pain became increasingly worse.

I continued practicing, teaching, and studying yoga. My thigh still bothered me, but I was able to compensate. A few years later, I went to Pune to study at the Iyengar Institute in Pune, India. This is the home base of the international Iyengar community and it is considered a prestigious privilege to be able to study there. In the formal classes I learned a great deal about asana and pranayama. While there, I also learned about what was becoming an open secret among the senior teachers: Many of them had hip problems. Even so, they kept pushing themselves into more extreme hip positions.

In my own body I knew something wasn’t right. I began to reevaluate the quest for flexibility and the need to do certain poses. I began to study with Donald Moyer, a senior teacher in Berkeley who wisely taught, “align yourself to your body, not the room.” Mary Paffard, one of my foundational teachers, began to talk about the dangers of “tricky Trikonasana.’” I listened—and not because of the fabulous alliteration. She was observing that the way many people where practicing the pose could be leading to injury. She warned us about how following rigid instructions and pushing oneself into the pose could cause harm. She debunked the then common instruction to line up the heel with the arch and encouraged her students to keep the pelvis free instead of keeping the hip points in the same plane. Based on their suggestions, I made more modifications to my poses. 

And yet the pain in my right thigh lingered. Cobbler’s Pose (Baddha Konasana), which I had easily done for years, was now painful. After consulting with many people, I determined that the pain I was experiencing was because of tightness in my psoas as a result of my scoliosis. Naturally, I thought the obvious things was to stretch my psoas, but this only made matters worse.

I continued my quest to discover the culprit. Doctors, chiropractors, and manual therapists acknowledged that I had a tight right psoas. I realized that the force of kicking a ball was at least one culprit. In order to heal, I decided I had to give up soccer. This was a great loss as I had been playing almost continuously since I was 12 years old. The sadness was not only for missing out on the joy of the game, but also for the social aspects of being an active member of Las Brujas, a team that I had co-founded 15 years earlier. I did my best to accept the loss. I continued to practice yoga but was much more conservative in my approach. Even with modifications, I realized Triangle pose was too tricky for me, so I stopped practicing it and teaching it.

I saw a number of allopathic doctors who, having a base cliental that rarely exercised and were eating the standard American diet, saw me as healthy and did not take my concerns seriously. As I was able-bodied it was difficult for them to empathize with how much this was affecting my life. Finally, my doctor approved an MRI. The first orthopedist who saw the results diagnosed me with Femoral Acetabular Impingement (FAI) and a torn labrum. He recommended surgery right away. I was frustrated and scared—the cost and recovery time were beyond my scope of imagination. I decided to get a second opinion. The second doctor was more conservative and said that at my age of 46, he didn't think surgery would make any difference. He explained that while my hips didn’t have any signs of arthritis, I had some congenital dysplasia, a condition where the acetabulum (hip socket)does not fully cover the head of the femur (thigh bone.) Over time, this can lead to damage of the soft tissues, movement dysfunction and pain. And he said that the pain I was experiencing was a natural effect of this "deformity." He empathized with me, especially about giving up soccer (he was an avid athlete.) but said that there was nothing really that I could do. So I went to Fenton’s—the best ice cream parlor in the world—and as I shared a Black and Tan Sundae with a dear friend, I decided to try my best to walk the path of acceptance.

For me, acceptance didn't mean giving up my quest to heal my hip. It meant being present with the reality of the current situation while simultaneously trying to make it better. I became even more careful about which classes I attended and had no compunction about modifying poses. I studied the anatomy of the hip joint in great detail and started teaching myself to move in new ways. I took my time. I became a student of the Z-health, a neurologically based approach to movement and learned the importance of having clear proprioceptive maps. Every day I practiced very small and slow movements with my hips to safely explore my entire range of movement.

I paid more attention to how other people practiced Triangle pose. I noticed an interesting phenomenon: in the quest to hinge more deeply in the front leg to support a long spine, many people were jamming into their back hip. To get a sense of this, imagine Olivia Newton-John at the end of Grease, putting out a lit cigarette with the tip of her high-heeled shoe while wearing skin-tight leather pants. She looks so cool! However, just as she is about to put out the cigarette with her right foot, she is leaning into her left hip and putting tremendous pressure on the bones of the hip joint as well as the soft tissue. You can watch it here at 1:04.  Her movement bypasses the use of the gluteus medius, the all-important side buttocks muscle. 

I began to see this habit many yoga practitioners, myself included. Tree pose was a big culprit. While focusing on balance, I leaned into the bones of the standing leg instead of using muscular strength. I realized that I must have been doing this for many years. The obvious course of action was to entirely retrain how I moved my hips. I had been to many yoga classes where we were firmly instructed to release the buttocks muscles but now I realized that gluteal amnesia, where your buttocks muscles are weak, sleepy, and atrophied, was part of the problem. 

I began to study the biomechanics of movement with Katy Bowman. Already having more than the average level of flexibility, I let go of my interest in going “deeper” into poses and focused on creating strength in different ranges of movement. Two of the movements that helped me the most were standing hip circles and hip lists (a term coined by Katy Bowman where one hip actively lowers down to lift the opposite leg up), both of which strengthen the gluteus medius in different ranges of movement. You can watch a short video of the hip lists and hip circles. See here for a video of hip circles and here for a video of hip lists.

I also worked on changing my gait so that instead of throwing my leg forward, I pushed off of my rear foot and then engaged the gluteus medius of the opposite leg to give clearance for the back leg to come forward. 

It took a few years. I had had to slow down quite a bit, but I began to feel better—much better. I returned to some of my previous activities that I had loved and sorely missed. In the mean time, I had also discovered Middle Eastern dance. I fell in love with the movements and the communal aspect of dancing together. and decided to pursue that instead of soccer. As my pain dissipated and I got stronger, I felt it was time to revisit my old friend Trikonasana with new eyes. I started by practicing with two blocks or sometimes just put my hand high up on the wall. I focused on creating stability before mobility and discovered that I could once again practice the pose with joy and delight.
These days, Triangle is my friend once again. When I teach and practice Trikonasana, I do a lot of preparatory movements that explore range of movement, stability, and strength. As gluteal amnesia is a scourge of chair-sitting society, I emphasize the need for using the gluteal muscles to stabilize the back hip and leg. And I share with students the reasons why creating whole-body integrity is far superior to the thrill of touching the floor.

As stories are now coming to light of long-term yoga practitioners who have chronic hip problems and hip replacements, I am eternally grateful to Mary Paffard for sharing her concerns about tricky Trikonasana. I understand that pain or dysfunctional movement cannot always be prevented or eliminated. However, in this particular instance, I believe that I caught myself before it was too late and share my story in the hope that others will benefit from my experience.

This article originally appeared, in a slightly different form, at


Sandra Razieli has been a certified yoga teacher since 2001. Trained originally in the Iyengar tradition, she teaches an alignment-based practice that encourages creativity and playfulness. She guides her students to recognize how changes in everyday habits of movement can lead to greater freedom, comfort and ultimately a more fulfilling life. Sandra is also R, I, S and T certified by Z-Health Neurological-Based Movement Training, is a Nutritious Movement™ Certified Restorative Exercise Specialist and is certified by Elise Miller as a Yoga for Scoliosis Trainer. She currently resides on Maui and travels frequently to California and Minnesota. You can find more information about Sandra and her teaching at www.raziyoga.com.


Subscribe to Yoga for Healthy Aging by Email ° Follow Yoga for Healthy Aging on Facebook and Twitter ° To order Yoga for Healthy Aging: A Guide to Lifelong Well-Being, go to AmazonShambhalaIndie Bound or your local bookstore.

Monday, 12 November 2018

Video of the Week: Dynamic Reclined Leg Stretch Pose

This dynamic version of the Reclined Leg Stretch pose, which I also refer to as Strap to Foot pose, is a good warm up for the static version or a great short standalone practice. Those with back issues or who had been told to avoid or be cautions about twisting should watch once through before trying or skip altogether.


Subscribe to Yoga for Healthy Aging by Email ° Follow Yoga for Healthy Aging on Facebook and Twitter ° To order Yoga for Healthy Aging: A Guide to Lifelong Well-Being, go to AmazonShambhalaIndie Bound or your local bookstore.

Follow Baxter Bell, MD on YouTubeFacebook, and Instagram. For upcoming workshops and retreats see Baxter's Workshops and for info on Baxter see baxterbell.com.